In Windows 11, there are several ways to take a snapshot of a specific area of the screen or open window, but using the Snipping Tool is probably the easiest. The Snipping Tool program takes the role of the previous Snipping Tool and Snip & Sketch apps. The new edition combines the best features of Snip & Sketch into a contemporary interface that resembles the previous Snipping Tool. In this post, you may Learn how to take screenshots with the Windows 11 Snipping Tool apps.
This post will show you how to utilize Windows 11’s Snipping Tool to snap screenshots.
- On Windows 11, modify the Snipping Tool settings.
- Change the color mode of the Snipping Tool in Windows 11
- Using the Print Screen key, launch Snipping Tool.
Take screenshots using Windows 11 Snipping Tool
To snap a screenshot with the Snipping Tool on Windows 11, follow these steps:
- On Windows 11, click Start.
- To open the app, search for Snipping Tool and pick the top result.
- Select the sort of snapshot you wish to take on Windows 11 from the “Snipping Mode” drop-down menu, such as “Window mode.”
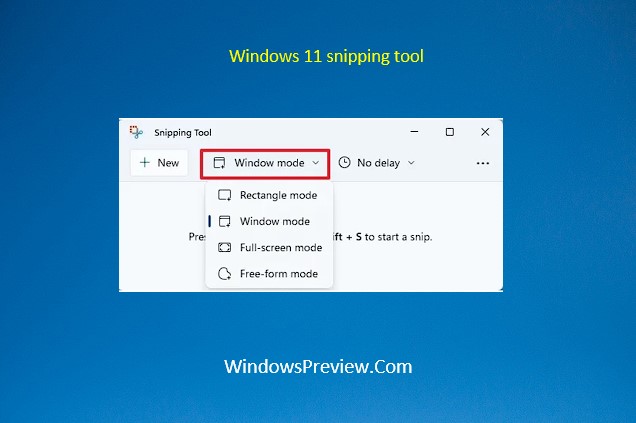
- Rectangle mode: To capture a rectangle, move the mouse cursor around an object.
- Select a window to capture, such as a browser window or dialog box, in window mode.
- Full-screen mode: The entire screen is captured.
- Draw a free-form shape around an object in free-form mode.
- Select the Time before Snip drop-down menu to postpone the capture (none, 3, 5, or 10 seconds) before clicking the snipping button.
- Select the “New” option.
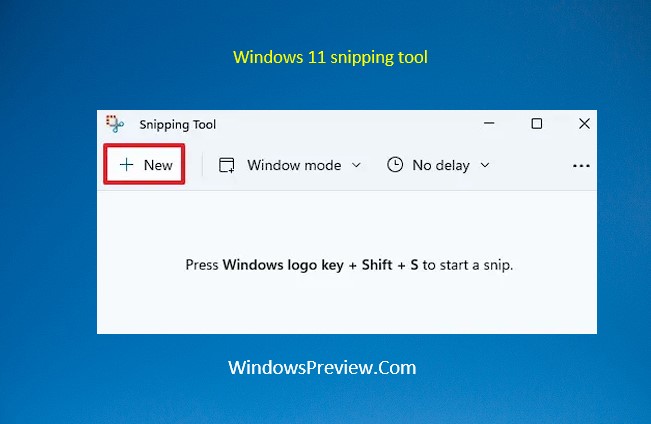
- Depending on the snipping mode, select the region to capture.
- Crop and resize the screenshot with the Image Crop tool.
- Annotate the image as needed with a ballpoint pen, highlighter, or touch writing tools.
- click the Save button, In the top-right corner.
- Select the image format from the “Save as type” drop-down option, which includes JPG, PNG, and GIF.
- Select the Save button.
Alternatively, you may copy the snapshot to the clipboard and paste it into a document by using the Copy button. You can also click the Share option to send the capture to others via email or social media.
You can also right-click the button when the app is open or pinned to the taskbar to open another app instance or snap extra screenshots.
Modify the Snipping Tool settings in Windows 11.
You may also customize the Snipping Tool experience to make it a little easier to grab screenshots.
To customize the Snipping Tool settings, follow these steps:
- On Windows 11, click Start.
- To open the app, search for Snipping Tool and pick the top result.
- Select Settings from the menu (three-dotted) button in the top-right corner.

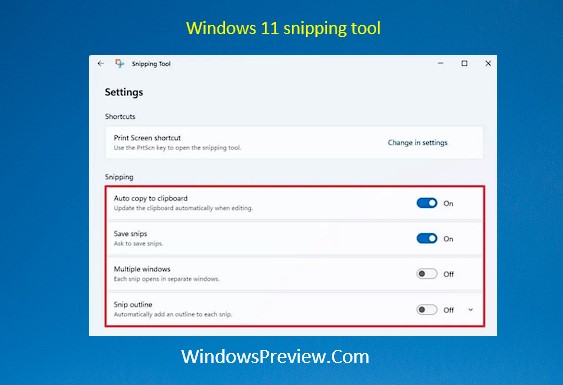
- Modify the Snipping Tool settings:
-
- Auto copy to clipboard: Automatically updates the clipboard when altering the capture.
- Save snips: When you close the app, it will prompt you to save the snapshot.
- Multiple windows: Instead of replacing them, opens a new window for each image capture.
- Snip outline: Adds boundaries to each snip automatically. The tool also allows you to choose the color and thickness of the outline.
When you finish the instructions, the Snipping Tool will reflect your customized settings.
On Windows 11, change the color mode of the Snipping Tool.
To switch between the bright and dark color themes for the Snipping Tool, do the following:
- On Windows 11, click Start.
- To open the app, search for Snipping Tool and pick the top result.
- Select Settings from the menu (three-dotted) button in the top-right corner.
- Select the “App Theme” setting from the “Appearance” section.
- Choose a Snipping Tool theme, such as Light, Dark, or Use system defaults.
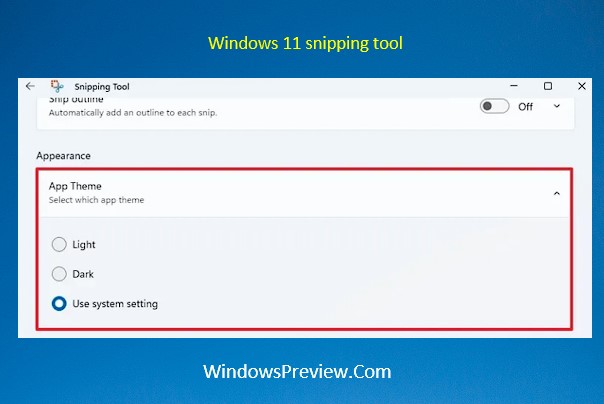
When you finish the instructions, the app will change to the color theme you selected.
Launch Snipping Tool by pressing the Print Screen key.
To bring up the snipping menu using the Print button rather than the Windows key combo:
- On Windows 11, click Start.
- To open the app, search for Snipping Tool and pick the top result.
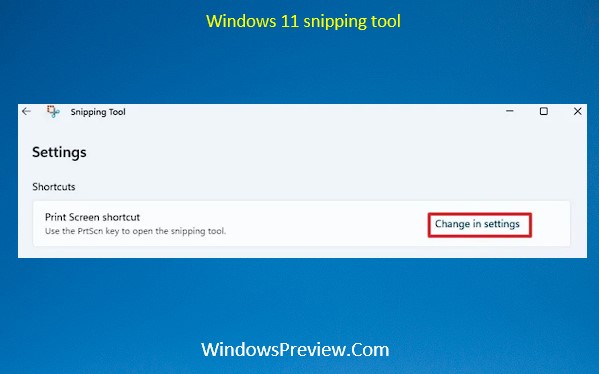
- Select Settings from the menu (three-dotted) button in the top-right corner.
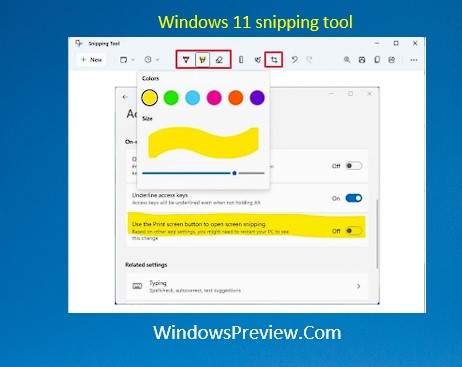
- Click the “Change in settings” option for the Print Screen shortcut setting under the “Shortcut” section.
- activate the toggle switch “Use the Print screen button to open screen snipping”.
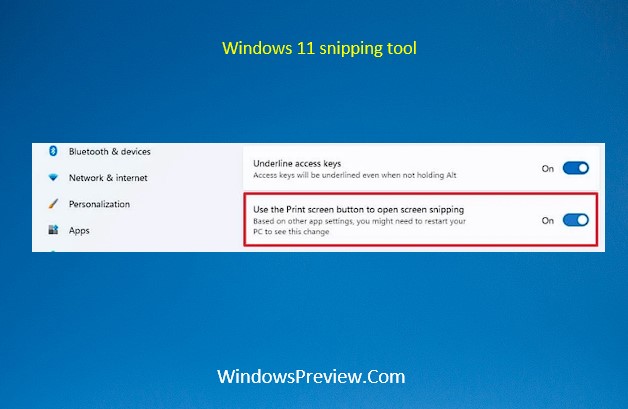
Once you’ve completed the steps, you may easily capture a screenshot on Windows 11 by pressing the Print Screen button instead of the Windows key + Shift + S keyboard shortcut.